Using Tutorials
Widget Library
The Widget Library in ThunderFire UX Tool is a tool that organizes, categorizes and manages the user's commonly used prefabs in the form of widgets.
Terminology
Widget
A widget is a generic and reusable prefab created by the designer during interface stitching in Unity, for example, a button that appears repeatedly in multiple interfaces can be stored as a widget for quick and easy reuse.
Widget Library
The widget library is used to categorize and organize widgets to make it easier for users to manage the widgets they create.
How to Use
Open via ToolBar : Enable ToolBar via the Unity top drop-down menu [ThunderFireUXTool-工具栏 (ToolBar)], then click the Widget Library button on ToolBar to open the Widget Library panel.

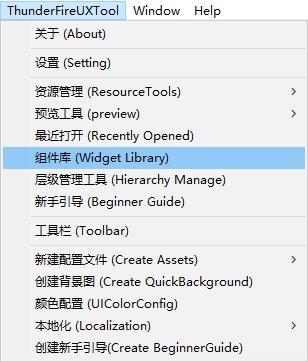
Open through the top drop-down menu : Click the Unity top drop-down menu [ThunderFireUXTool-组件库 (Widget Library)] to open the Widget Library panel as well.
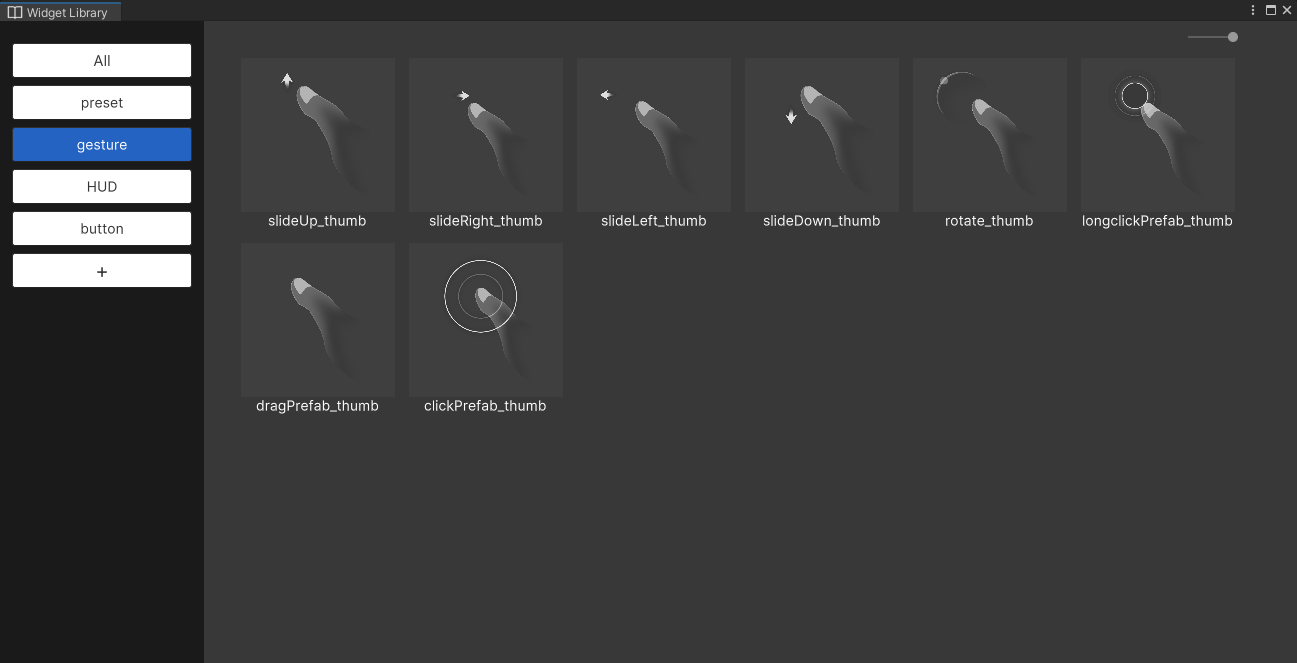
In the Widget Repository panel, the widget category tab is on the left side, click the corresponding tab to see all widgets under that category on the right side. Click the "+" sign to create a new widget category. Right-click on an existing category tab to modify the category name or delete the category.
Creating widgets
Widgets can be created in three ways. Any Prefab or non-Prefab node can be created as a widget.
Create by ToolBar : Enable ToolBar through the drop-down menu [ThunderFireUXTool-工具栏 (ToolBar)] at the top of Unity. After selecting a prefab or node in the Scene, click the [New Widget button] on the ToolBar, a New Widget pop-up window will appear, fill in the information and the creation is complete.

Create by dragging and dropping : Open the Widget Library panel, directly drag and drop the prefab or node from Hierarchy or Project to the Widget Library panel, a New Widget pop-up window will appear, fill in the information to create it.
Create by right-click :Select a prefab in Project and right-click [设置为组件(Set As UXWidget)], a New Widget pop-up window will appear, fill in the information to create it.
Managing widgets
The Widget is displayed in the Widget Repository as a thumbnail, double-click it to open the corresponding prefab of the widget directly.
Modify information
Right-click the widget in the Widget Repository to modify the widge properties, including widget name, widget type, widget storage location and widget generation mode.
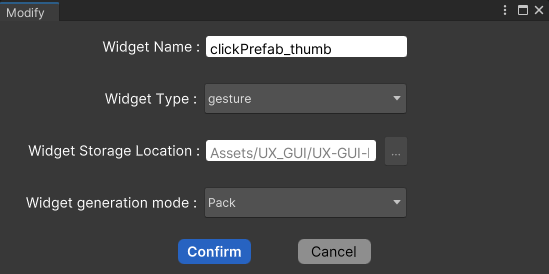
- Widget Name: This refers to the name of the prefab that corresponds to the widget. If you make any changes to the widget name, it will also modify the name of its corresponding prefab.
- Widget Type: By default, this is set as "All", and when you create a new widget by dragging and dropping it, its current classification will be automatically recognized. You can also create a new type in the Widget Information panel by clicking on "+" sign.
- Widget Storage Location: The location of the corresponding prefab in the project, which cannot be modified after setting once.
- Widget Generation Mode:
- Prefab: i.e. the widget is added to the scene or prefab in the form of prefab.
- Unpack Prefab: i.e. the widget is unpacked from the prefab and added directly to the scene or prefab as a normal node.
Delete widget
To delete the widget, right-click on it in the Widget Library. You can choose to remove it from the Widget Library list only or also delete its corresponding prefab local file.

Using widgets
The created widget can be used in the Scene or prefab by opening the Widget Repository panel and dragging the corresponding widget directly to the Scene panel to generate it.
