Using Tutorials
Notch Screen Adaptation
Adapting to notch screen is a technique for dynamically adjusting the position of UI to fit various sizes of the SafeArea on different devices. ThunderFire UX Tool has implemented a feature for quick adaptation to different screen sizes.
How to use
-
Switch Unity Game scene to Simulator mode.

-
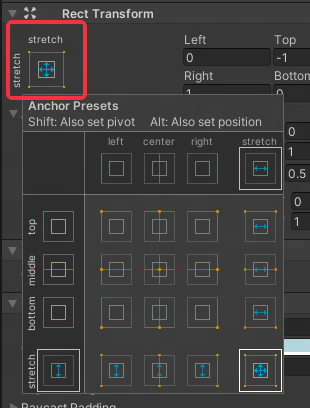
Create a root object under the Canvas that includes all other UI widgets, and set the Anchor Preset to Stretch to fill the entire space of the Canvas. To set up, refer to the following image:
-
Attach the UIAdapter component to the root object, and set the Anchor Preset of the UI widget that requires notch screen adaptation to a type other than Middle Center. For example, if you need to place a button in the top left corner of the screen and ensure adaptation, set the Anchor Preset to "top left".
-
If a UI widget under the root object does not need to be adapted, attach the IgnoreUIAdapter component to it, which can ignore notch screen adaptation (mainly used for Quick Background).
UIAdapter Component
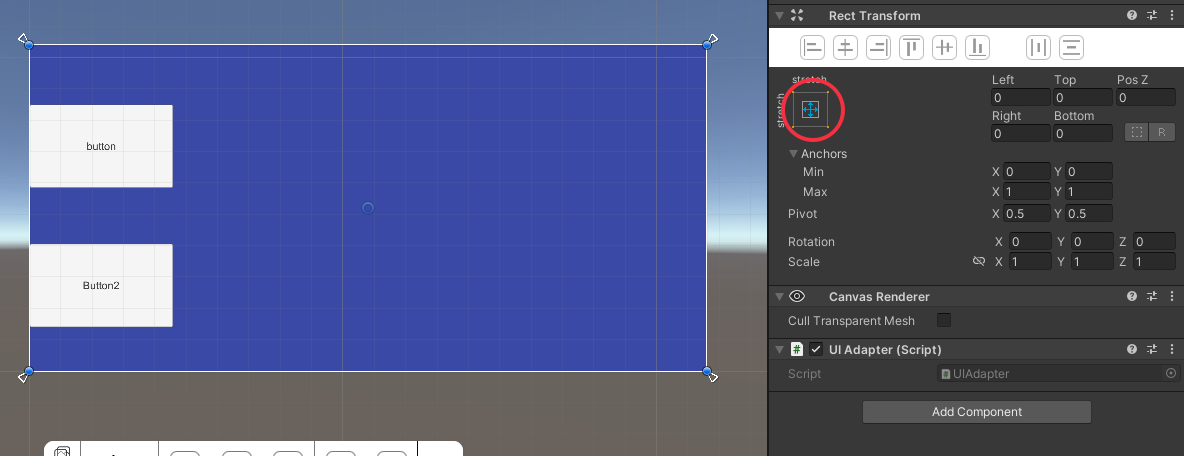
To make the UI root object adaptable to the Canvas size, it is usually necessary to set the Anchor Preset of the root object to Stretch and then adjust the UI based on it, as shown in the red circle in the figure. It is recommended to attach the UIAdapter component to this root object, which will adjust the Anchor of this root object to the appropriate value based on the scale of SafeArea, thereby completing the adaptation function for the notch screen. The steps are as follows:
-
Set the Anchor Preset of the root object to Stretch.
-
Adjust the size of the root object to the appropriate size.
-
Attach the UIAdapter component to the root object.
-
Open the simulator, select the device model, and run to see the effect.
Note: If the child object in UI needs to be adapted to the notch screen, set its Anchor Preset to a type other than Middle Center.
IgnoreUIAdapter Component
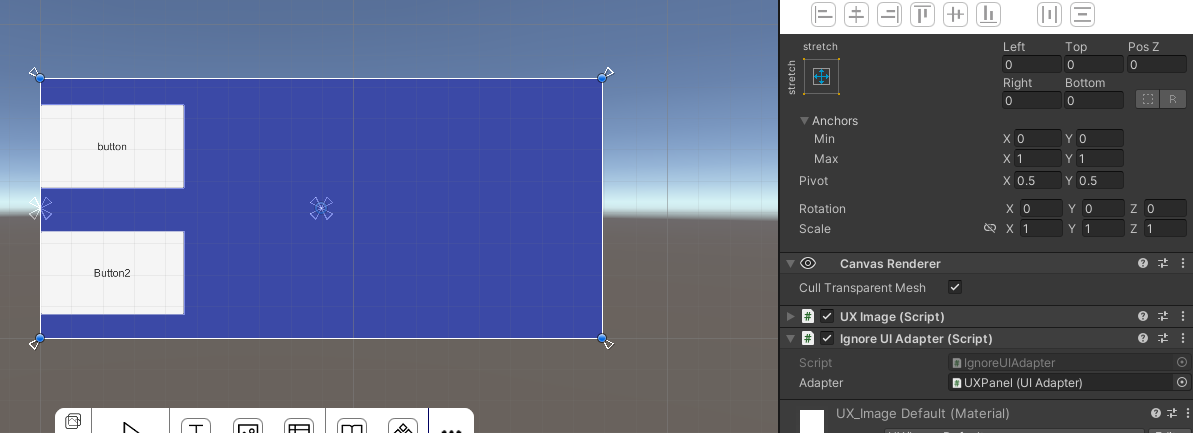
For some UI elements (such as in-game backgrounds) that do not need to be adapted to the notch screen, you can attach the IgnoreUIAdapter component to them and set the UIAdapter of their parent object in the Inspector panel. We will calculate the offset of the UIAdapter and add the original offset to this object to achieve the effect of ignoring the Adapter in the parent object. Generally, the Anchor Preset of these backgrounds should also be set to Stretch. The steps are as follows:
-
Set the Anchor Preset of the background to Stretch.
-
Adjust the size.
-
Attach the IgnoreUIAdapter component. Drag the parent's UIAdapter in the Inspector and assign its values to the component. (If not assigned, the component will be searched in the parent node.)
Note: Do not attach this component if the Anchor Preset of this object is set to Middle Center.
Adaptation Cases
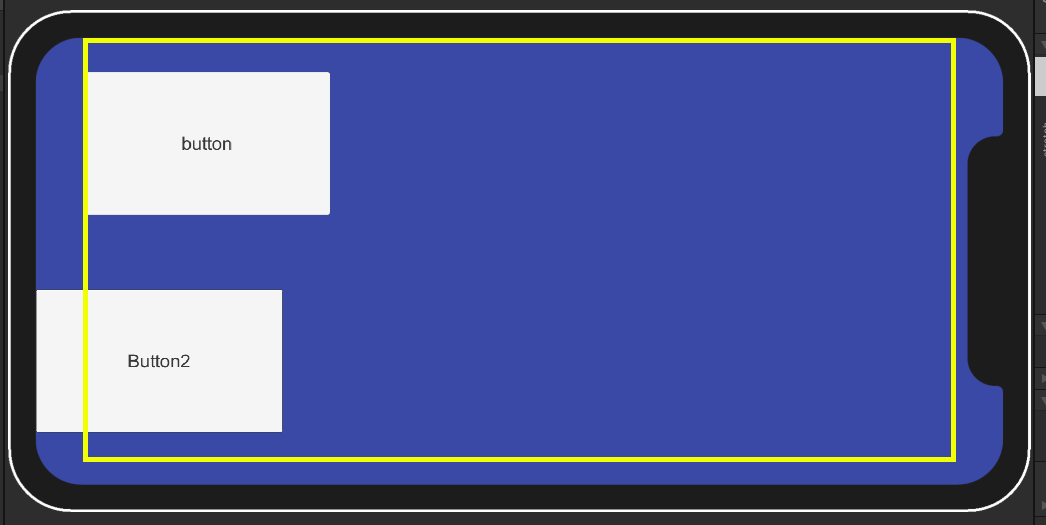
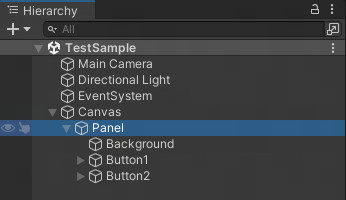
Case scene directory structure: UXPanel is the root object to be adapted, and the UIAdapter component should be attached as required in the previous section, occupying the entire Canvas space. UXImage is the background, which should be ignored according to the method mentioned earlier, and it is best to occupy the space of the root object.
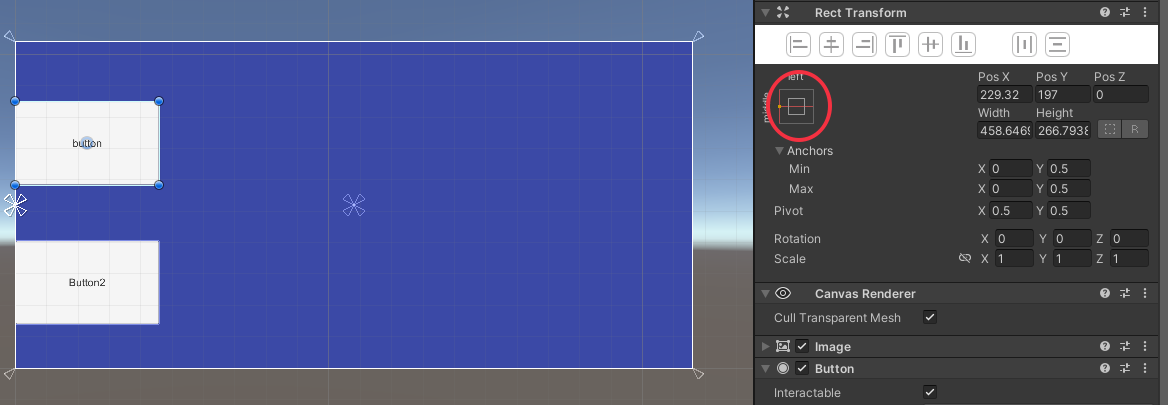
Example of the first Button: Set the Anchor Preset to Middle Left for this button to be adapted to the left edge.
Example of the second Button: The Anchor Preset is set to Middle Center, so when adapting, it is not guaranteed to be within the SafeArea.
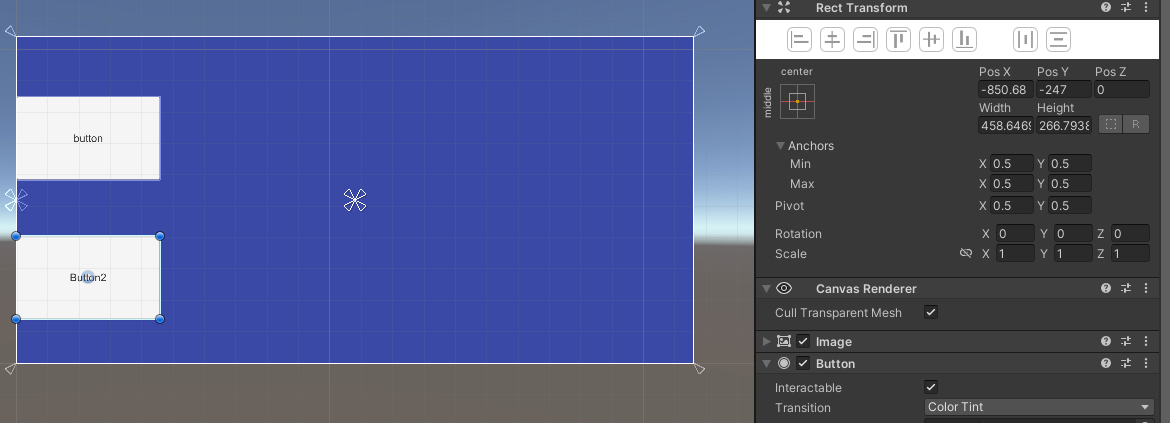
Running result: The first Button is adapted correctly, the second Button is not adapted.
